
The Complete Guide to Pebble Tile
When it comes to creating a unique and visually captivating floor surface, pebble tiles are an exceptional choice. These tiles offer a blend of natural beauty and durability that can transform any space into a serene oasis.
In this blog post, we’ll explore what pebble floor tile is, the different types available, how to install them, and essential care tips to maintain their timeless appeal.
Hey friend! This post includes affiliate links (including Amazon). If you purchase through my links, I may earn a small commission—at no extra cost to you. These commissions help keep Free Range Cottage running. Thanks for your support!
What is Pebble Floor Tile?
Pebble floor tiles are made from natural stones or pebbles that are meticulously handpicked, sorted, and mounted onto a mesh backing for easy installation.
They come in various sizes and shapes, resembling the smooth, round stones found along riverbanks or beaches. These tiles offer a distinct and tactile surface that adds an element of nature to your home decor.
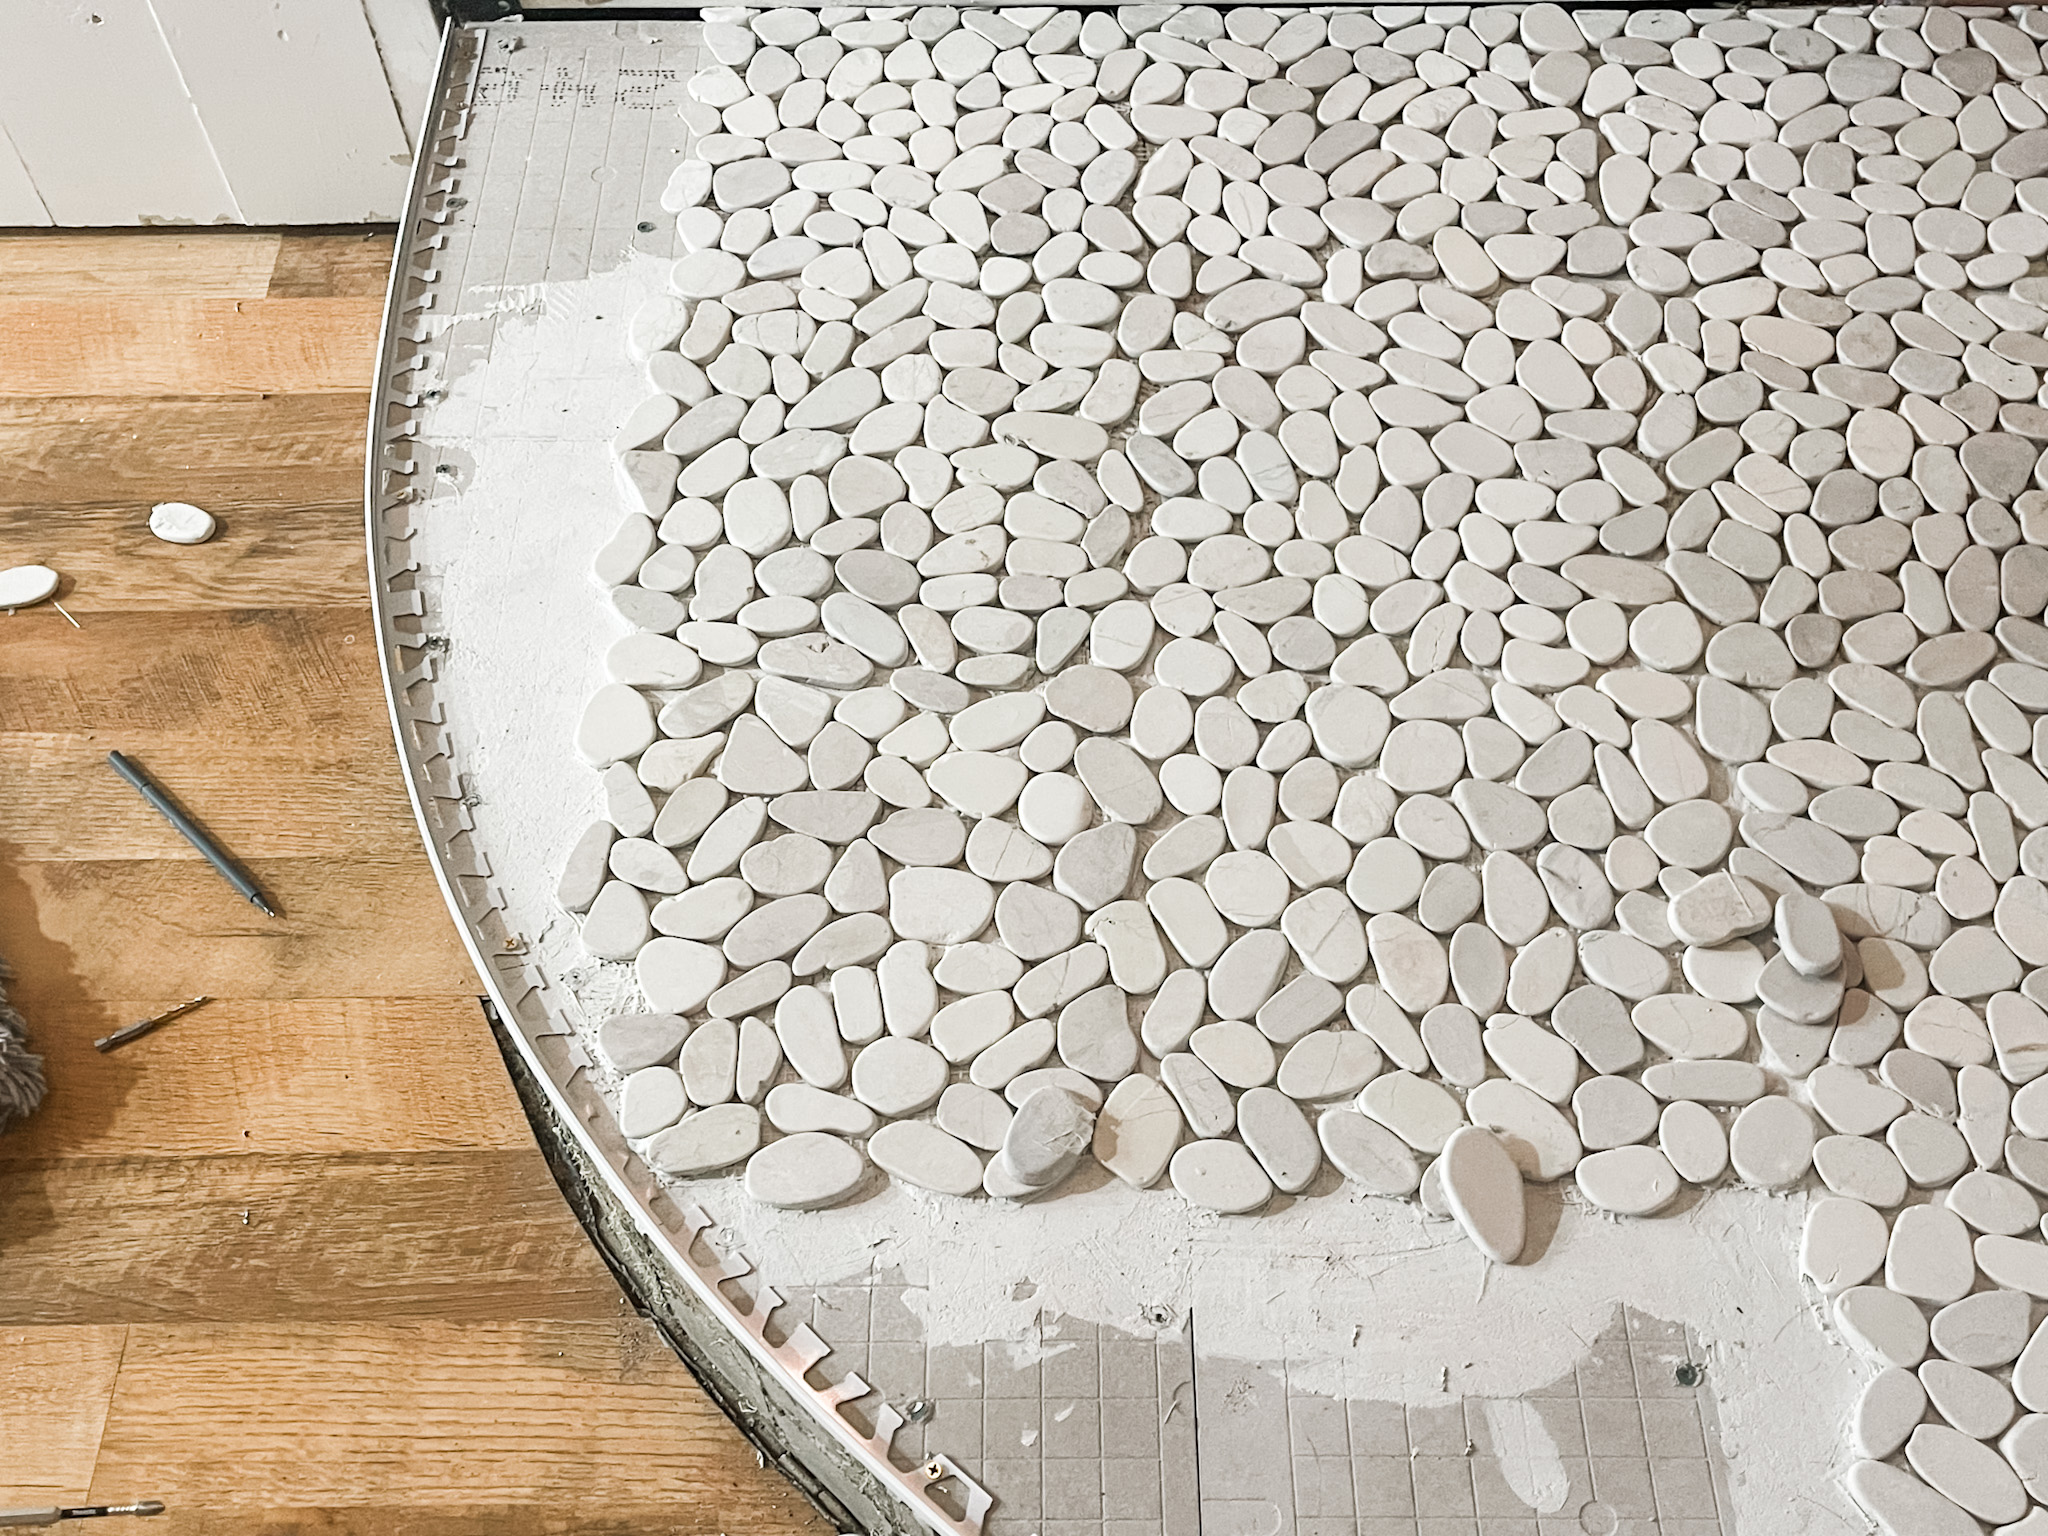
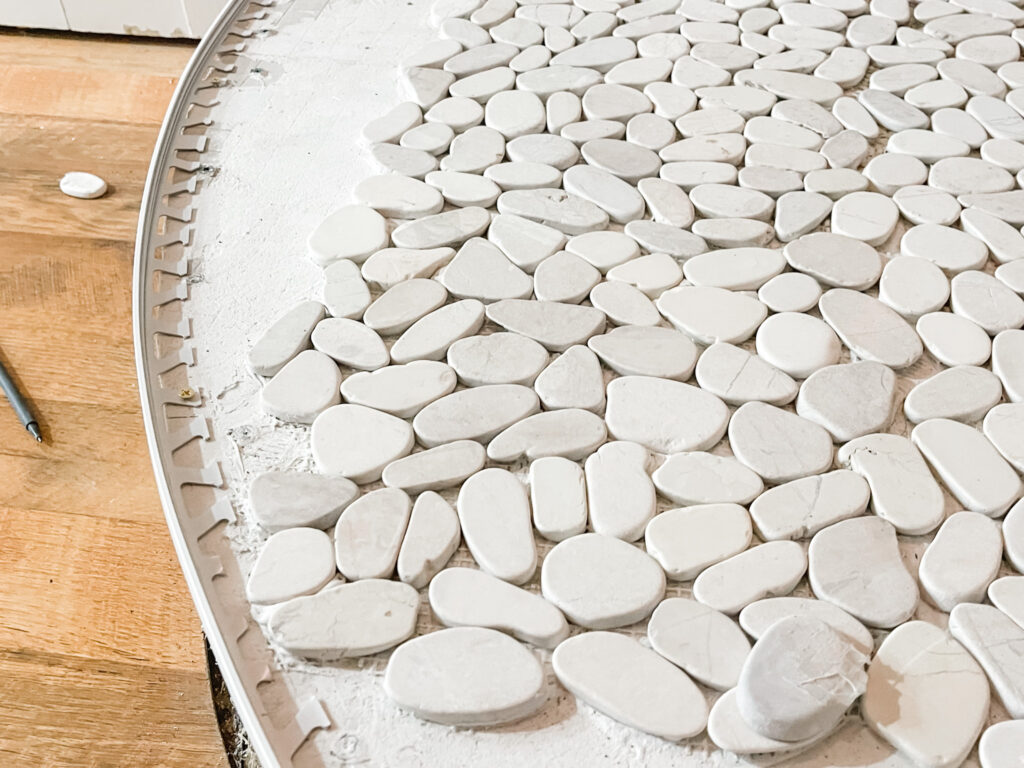
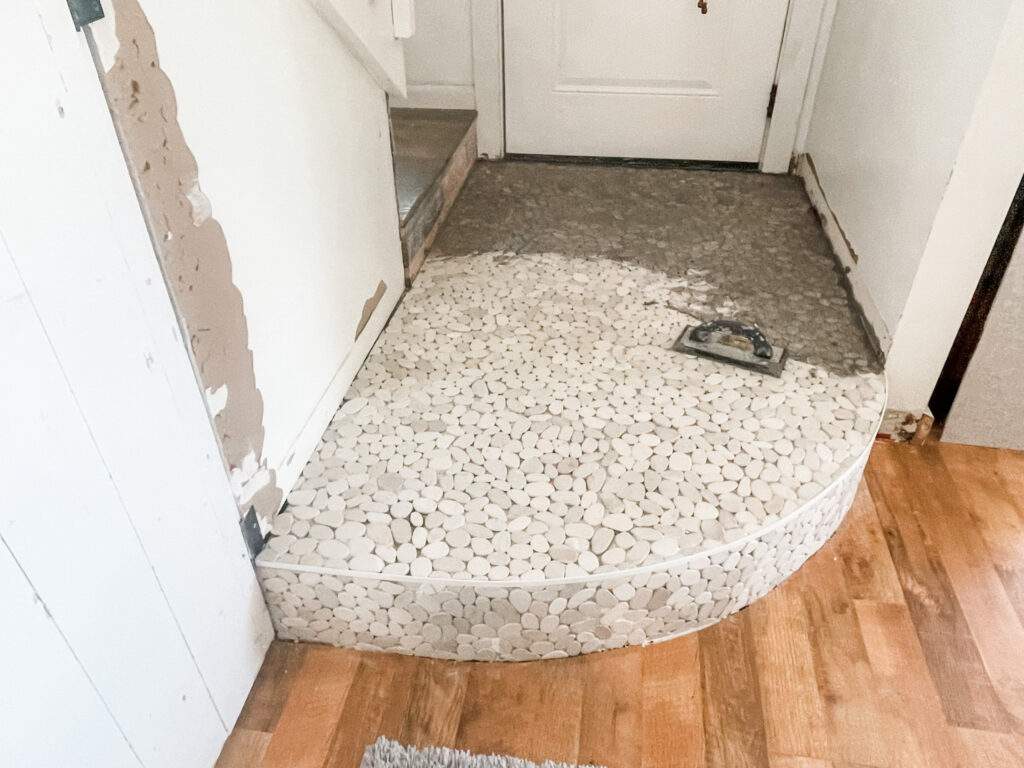
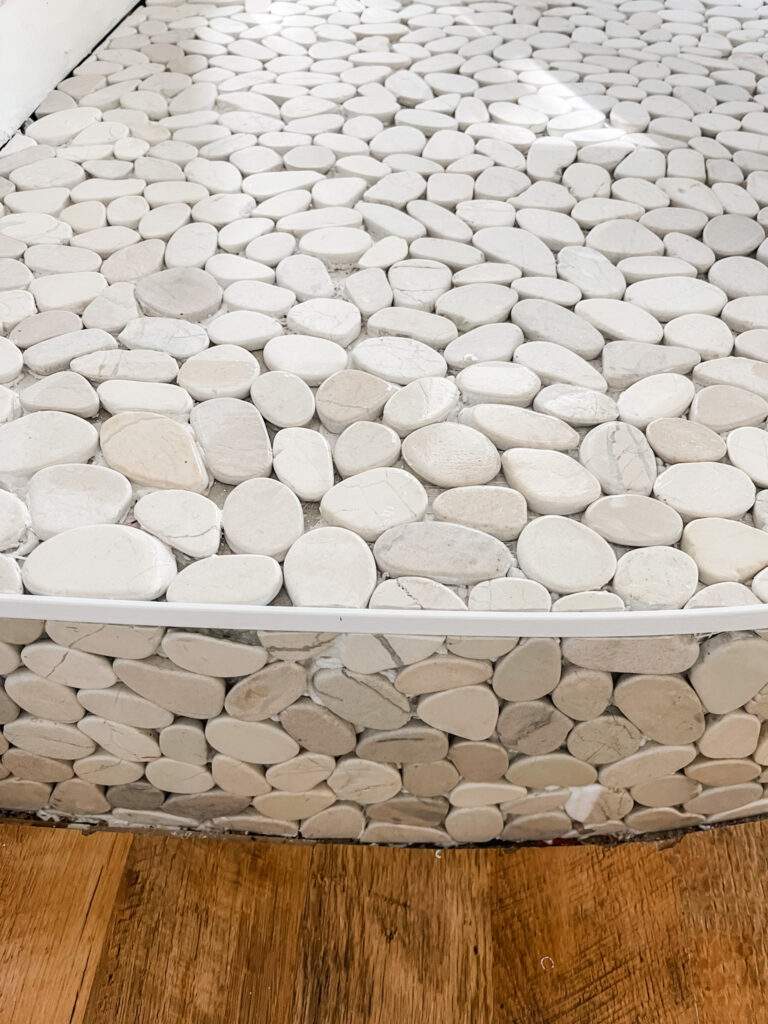
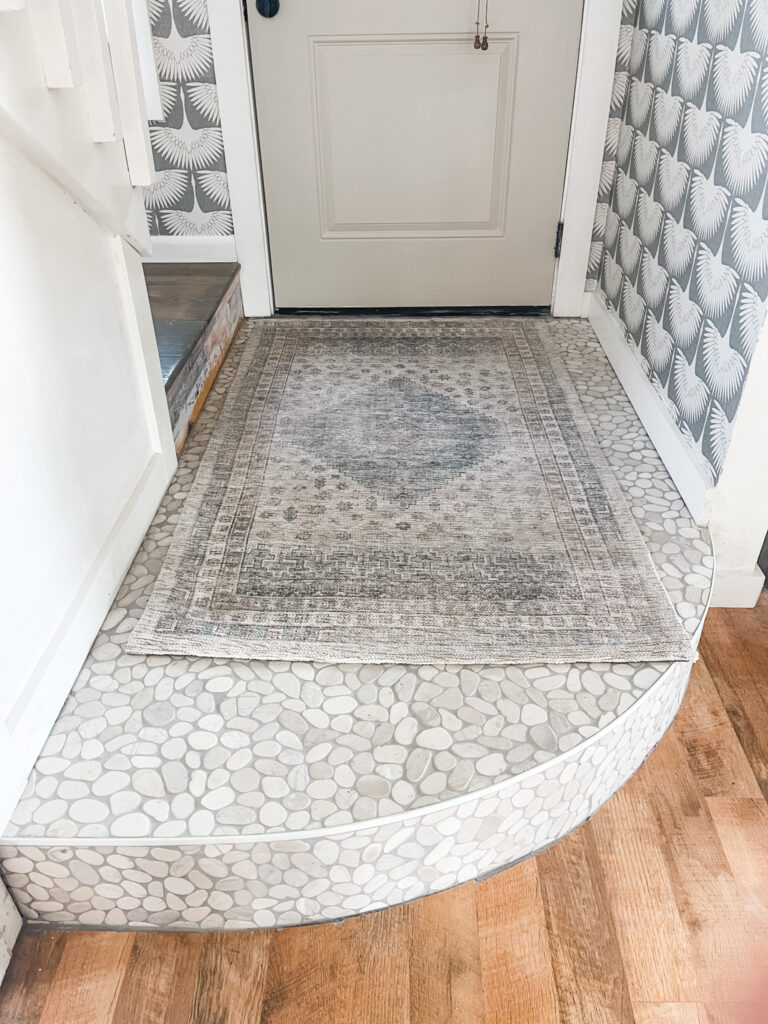
We added Pebble Tile to our front entryway. We love the natural and organic look of it. It has held up well and been easy to maintain.
To see our completed entryway makeover go right here!
Types of Pebble Tile
- Flat Pebble Tile: These tiles feature flat, polished pebbles that create a sleek and modern look. They are excellent for bathrooms and showers, where the flat surface provides comfort underfoot.
- Sliced Pebble Tile: Sliced pebble tiles are created by slicing larger pebbles into thin, flat sections. They offer a smoother, more consistent surface while retaining the natural pebble appearance.
- Standing Pebble Tile: Standing pebble tiles are made from larger, upright pebbles, creating a textured, three-dimensional surface. They are often used in spas and outdoor areas for a unique and therapeutic feel.
- Random Pebble Tile: These tiles feature a mix of pebble sizes and shapes, creating a truly organic and visually stimulating surface. They are ideal for creating a rustic and natural ambiance.
How to Install Pebble Floor Tile
Installing pebble floor tiles can be a rewarding DIY project if you have some experience with tile installation. Here’s a basic guide to get you started:
Materials you’ll need:
- Pebble floor tiles
- Thinset mortar
- Notched trowel
- Grout
- Grout float
- Sealer
- Sponge
- Rubber mallet
- Tile spacers (if necessary)
- Tile saw (if necessary)
Installation Steps:
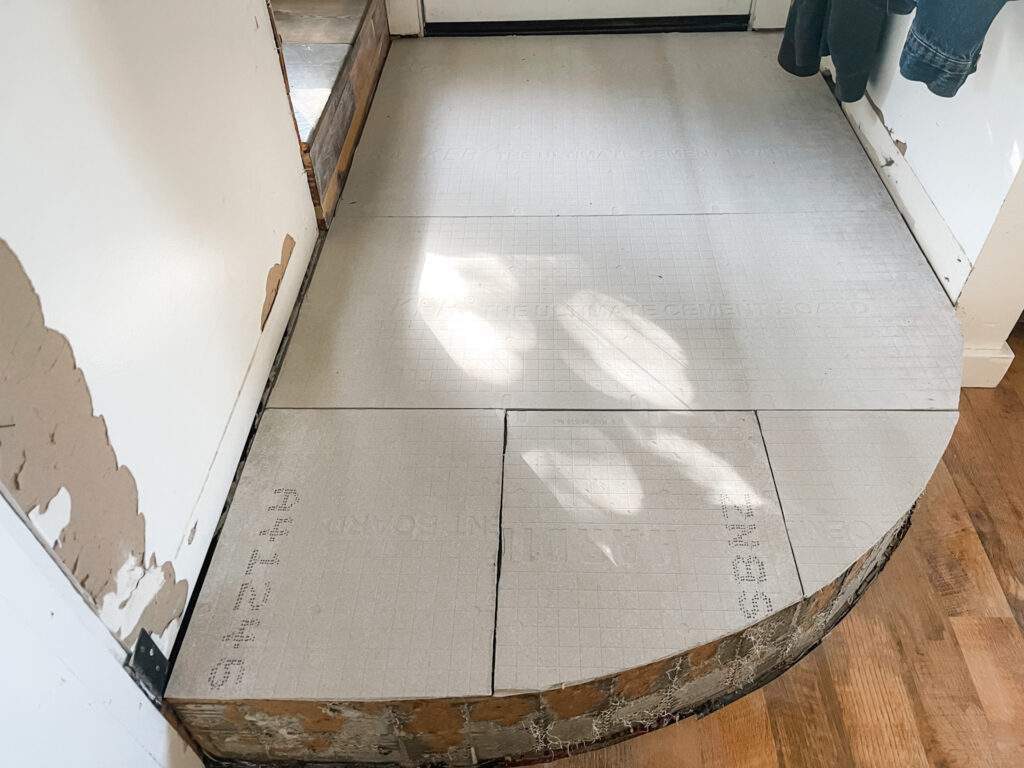
- Prepare the surface: Ensure your subfloor or existing floor is clean, level, and dry. If installing in a wet area like a bathroom or shower, apply a waterproof membrane. We installed Hardie Board to ensure a solid surface, since our entry is a sturdy plywood base. This helps prevent cracking of the tile and grout.
- Plan your layout: Lay out the pebble tiles on the floor to plan your design. Adjust the layout to ensure an even distribution of pebbles.
- Mix thinset mortar: Follow the manufacturer’s instructions to mix the thinset mortar to the right consistency.
- Apply thinset: Use a notched trowel to spread a layer of thinset onto the prepared surface. Work in small sections, as thinset dries quickly.
- Lay the pebble tiles: Press the pebble tiles firmly into the thinset, starting from one corner and working your way out. If necessary, use tile spacers to maintain even spacing between tiles.
- Cut tiles to fit: Use a tile saw to cut tiles at the edges and corners to fit the desired shape.
- Grout the tiles: After the thinset has dried (typically 24 hours), apply grout between the pebble tiles using a grout float. Ensure all gaps are filled and wipe away excess grout with a damp sponge.
- Seal the surface: Once the grout has dried (usually after 48 hours), apply a sealer to protect the pebbles and grout from moisture and stains.
How to Care for Pebble Floor Tile
Maintaining the beauty and longevity of your pebble floor tile requires some regular care:
- Regular cleaning: Sweep or vacuum your pebble floor regularly to remove dirt and debris. Use a pH-neutral stone cleaner for mopping.
- Avoid harsh chemicals: Avoid using acidic or abrasive cleaners, as they can damage the pebble’s surface. Stick to mild, pH-neutral products.
- Seal regularly: Reapply a sealer every 6-12 months or as recommended by the manufacturer to maintain protection against stains and moisture.
- Prevent scratches: Place felt pads under furniture legs to prevent scratching the surface.
- Address spills promptly: Clean up spills as soon as they occur to prevent staining.
Conclusion
Pebble floor tile is a stunning and versatile option for adding natural beauty and texture to your living spaces. With various types to choose from, installation options for DIY enthusiasts, and proper care, your pebble floor can remain an elegant and timeless element of your home’s decor. Whether you’re revamping a bathroom, kitchen, or outdoor patio, pebble tiles offer a unique and visually appealing solution that brings the outdoors in.
Frequently Asked Questions
- Is pebble tile hard to install? Pebble tile installation can be moderately challenging, particularly for beginners. It involves ensuring an even surface, arranging pebbles to create a desired pattern, and grouting. Experience with tile installation is helpful, but with patience and the right tools, it’s a manageable DIY project.
- Do you use sanded or unsanded grout for pebble floor? The choice between sanded and unsanded grout depends on the width of the grout lines. Use sanded grout for wider gaps between pebbles (1/8 inch or more) and unsanded grout for narrower gaps (less than 1/8 inch).
- What are the different types of pebble tiles? There are several types of pebble tiles, including flat pebble tiles, sliced pebble tiles, standing pebble tiles, and random pebble tiles. Each type offers a unique texture and appearance suitable for various design preferences.
- How do you install pebble tile on the floor? To install pebble tile on the floor, prepare the surface, apply thinset mortar, lay the pebble tiles, cut tiles to fit if necessary, grout the tiles, and seal the surface once the grout is dry. Be sure to follow specific manufacturer instructions and consider hiring a professional if you’re uncertain about the process.
- Does pebble tile need to be sealed? Yes, pebble tile should be sealed to protect it from moisture and stains. Reapply a sealer every 6-12 months or as recommended by the manufacturer to maintain its integrity.
- What is the most difficult tile pattern to install? Intricate tile patterns like herringbone, chevron, or Versailles patterns can be more challenging to install due to precise alignment and cutting requirements. However, the difficulty can vary depending on one’s experience and the specific pattern.
- What is the best grout for pebble tile? The best grout for pebble tile depends on the width of the grout lines. Use sanded grout for wider gaps and unsanded grout for narrower gaps. Choose a grout color that complements your pebble tiles and desired aesthetic.
- What mortar for pebble tile? Thinset mortar is typically used for installing pebble tiles. Ensure you choose a thinset mortar suitable for the specific surface and conditions of your project. Follow the manufacturer’s recommendations for mixing and application to achieve a secure bond.


Hi,
My pebble tile are in 12 x 12 sheets. My son is insisting that they be removed from the mesh which has lead to the halt in the bathroom remodel. It’s been a year without the bathroom now. I’m taking matters into my own hands. I helped my mother tile a bathroom years ago, but this is different from what we did. What insight can you share? Thank you,
Heather
Hi Heather, We kept the pebbles on the mesh and just fitted them together like a puzzle. Occasionally we had to move one around to make it work. I hope that helps and you get your tile done soon! It’s worth the wait. 🙂