The Complete Guide to Creating a Thrifted Hot Cocoa Station: Every Detail You Need
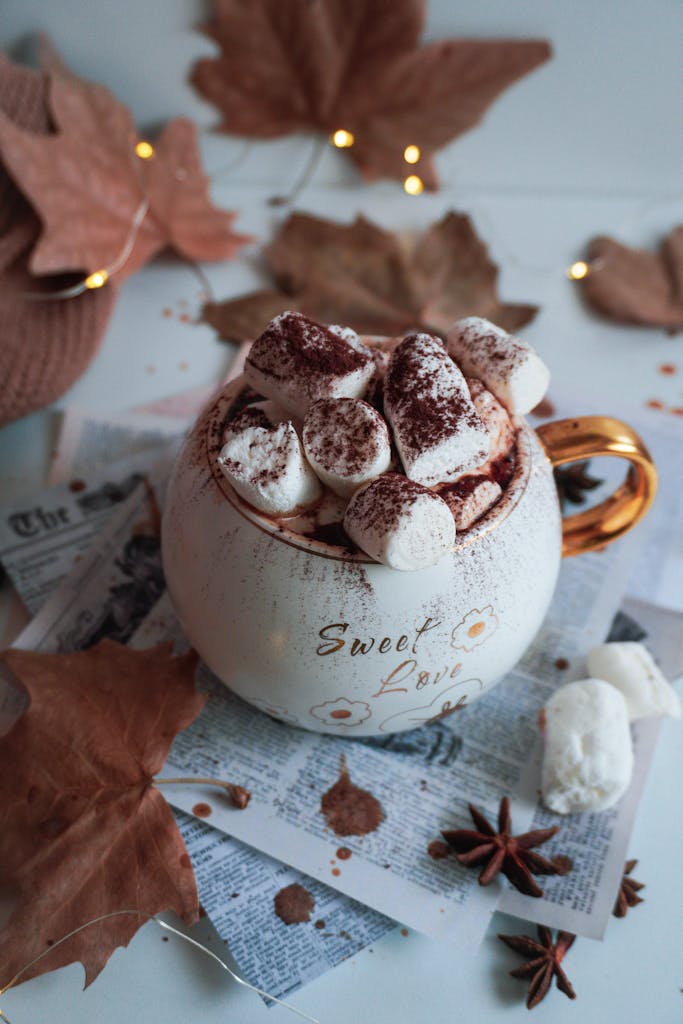
One of the most charming and functional ways to use thrifted Christmas decor is by creating a dedicated hot cocoa station. A well-styled hot chocolate bar instantly makes your home feel more festive and party-ready, and the best part? Every single element can be sourced secondhand for a fraction of what you’d pay for a new coffee bar setup.
Let me walk you through exactly what to look for and how to style it for maximum coziness and functionality.
This post contains affiliate links. If you purchase through these links, I may earn a small commission at no extra cost to you.
Why a Hot Cocoa Station Makes the Perfect Thrifting Project
Unlike Christmas-specific decor that only works for one month a year, the pieces you gather for a hot chocolate station can serve you throughout the winter season and even transition into coffee or tea service during other times of the year.
You’re not just decorating—you’re creating a functional entertaining space that happens to look beautiful.
Essential Thrifted Items for Your Hot Cocoa Station
The Foundation: Trays That Set the Stage
Every great hot cocoa station starts with a solid foundation, and vintage trays are absolute gold for this purpose. When you’re thrifting, keep your eyes open for:
Wooden Trays: Look for rectangular or oval wooden serving trays with handles. These can be rustic and distressed for a farmhouse look, or polished wood like mahogany or walnut for something more traditional. The beauty of wooden trays is their warmth and the way they ground a display.
A large wooden tray (18-24 inches) can hold everything from mugs to jars to a small pitcher of milk, creating a self-contained station on your kitchen counter or dining room sideboard.
Metal Trays: Vintage metal trays come in so many styles. Silver-plated rectangular trays bring instant elegance, while galvanized metal trays lean farmhouse-rustic. Brass trays add warmth and a touch of glamour. Don’t shy away from tarnished silver—that patina is desirable and tells a story.
Metal trays are especially nice because they’re durable and can handle condensation from hot mugs without worry.
Lacquered Trays: These beauties from the 1960s-80s often feature gorgeous colors and patterns—think black lacquer with gold details, or colorful designs with Asian-inspired motifs. A lacquered tray brings personality and can be a conversation starter.
They’re perfect if you want your hot cocoa station to have a more eclectic or vintage glam vibe.
Layering Tip: Don’t feel limited to one tray. You can use a large tray as your main base and smaller trays or cutting boards to create levels within your display. A small wooden cutting board can elevate your syrup bottles, while a vintage silver tray can showcase your prettiest mugs.

Mugs: The More Mismatched, The Better
The magic of a thrifted hot cocoa station is in the personality of mismatched vintage mugs. Forget buying a matching set—the collected-over-time look is what makes this special.
What to Look For:
- Oversized mugs that hold 12-16 ounces (perfect for generous servings)
- Vintage holiday mugs with retro graphics (but don’t limit yourself to Christmas-specific designs)
- Ceramic mugs in warm colors: burgundy, forest green, cream, chocolate brown, dusty rose, icy blue
- Restaurant-style heavy ceramic mugs in white or cream (these are workhorses and look classic)
- Vintage floral or pattern mugs from the 70s and 80s
- Stoneware mugs with that beautiful matte finish
- Glass coffee mugs (these show off the layers of your hot chocolate beautifully)
- Vintage tea cups and saucers for an elegant, sit-down service option
The Vintage Mug Tree Holder: Here’s a thrift store find that’s absolutely perfect for a cocoa station: the vintage mug tree or mug holder. These were popular in the 70s and 80s, and they’re usually wood or metal with hooks or pegs that hold mugs.
A mug tree keeps your mismatched collection organized and accessible while also serving as a decorative element. Look for wooden mug trees you can leave natural or paint to match your decor, or metal ones in brass or chrome. Display your prettiest mugs on the tree so guests can see all their options at a glance.

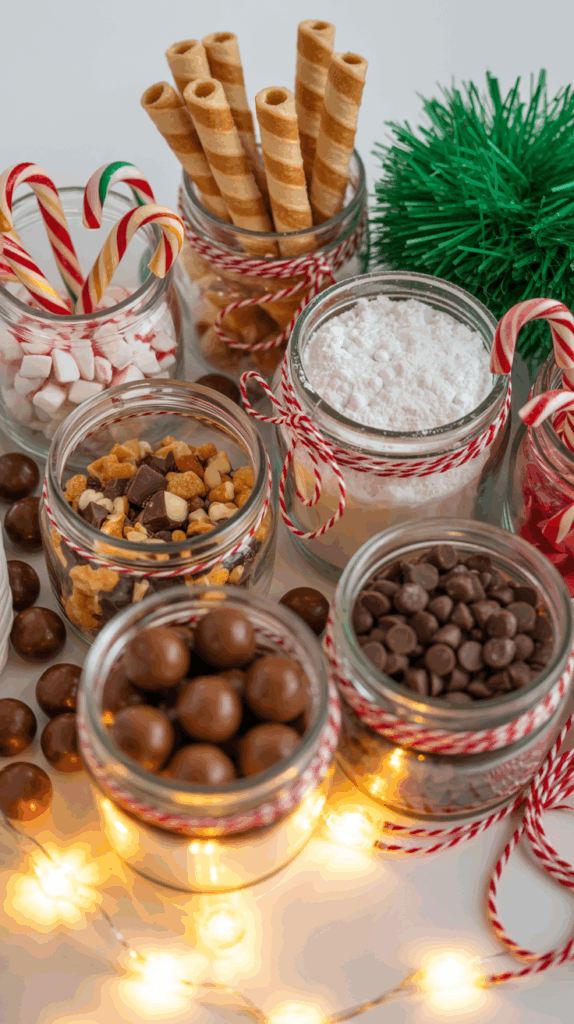
Glass Jars: Display Your Toppings Like Candy Shop Treats
Clear glass jars turn simple toppings into part of the decor. When you’re thrifting, grab any of these:
Apothecary Jars with Lids: These tall, elegant glass jars with glass or metal lids are perfect for marshmallows, chocolate chips, or peppermint pieces. They protect contents from humidity while looking beautiful.
Mason Jars in Various Sizes: Classic and affordable, mason jars work for everything. Use pint jars for smaller toppings like crushed candy canes, quart jars for marshmallows or whipped cream (keep these in the fridge until needed).
Vintage Candy Jars: Short, wide glass jars that may have once held penny candy are ideal for cookies, biscotti, or other treats to serve alongside hot cocoa.
Glass Canisters: Square or rectangular glass canisters with metal lids look organized and sophisticated lined up in a row.
Styling Tip: Remove any existing labels from your thrifted jars. Most commercial labels come off easily with hot water and dish soap, or use Goo Gone, or Lemon Essential Oil for stubborn adhesive. The clear glass lets the colorful toppings become the visual interest.
Small Crocks and Containers: The Organizational Heroes
Small crocks, ceramic containers, and vintage planters are perfect for corralling spoons, candy sticks, stirrers, and other small items that can look messy if not contained.
What to Look For:
- Small white ironstone crocks or pitchers (2-4 inch size)
- Vintage ceramic planters or small vases
- Restaurant-style ceramic creamers
- Small milk glass containers
- Stoneware crocks with a rustic farmhouse feel
- Small enamelware cups
- Vintage sugar bowls without lids (the lids are often missing anyway, but the bowl is perfectly useful)
How to Use Them:
- Fill a small crock with candy canes, peppermint sticks, or cinnamon sticks for stirring
- Use another for your collection of mismatched vintage spoons
- Keep napkins rolled and standing upright in a small crock or pitcher
- Display wrapped chocolates or foil-wrapped kisses in a pretty ceramic container
- Use a small vase to hold a few stems of evergreen or faux berries for decoration
Mismatched Silverplate Spoons: Functional Beauty
This is one of my favorite thrift store finds for a cocoa station: vintage silverplate spoons. Thrift stores are overflowing with mismatched silverware, and silverplate spoons are usually priced at a dollar or less.
Why Silverplate Spoons Are Perfect:
- They’re heavier and more substantial than modern stainless steel
- The patina and tarnish add character (you can polish them or leave them—both look good)
- Mixing patterns creates that collected, vintage charm
- They feel special in your hand—much nicer than disposable or cheap spoons
- Different patterns tell different stories and spark conversation
Where to Display Them: Place your collection of mismatched silverplate spoons in one of those small crocks we just talked about, handles up so guests can see the different patterns. Or lay them on a small vintage tray or saucer next to your mugs.
If you find vintage spoon rests, even better—they keep your counter clean while adding to the vintage vibe.

Bottles with Pour Spouts: Professional Barista Vibes
This is where your hot cocoa station goes from cute to genuinely functional. Those glass bottles with pour spouts aren’t just for coffee shops—you can create your own using thrifted finds.
What Bottles to Look For:
- Vintage glass milk bottles (the small individual-serving size is perfect)
- Glass bottles with narrow necks (old wine bottles, decorative oil bottles, vintage soda bottles)
- Clear glass bottles in various heights
- Decorative glass decanters
- Glass syrup dispensers (sometimes you’ll find actual vintage syrup dispensers with pour spouts still attached!)
Where to Find Pour Spouts: You can buy inexpensive pour spouts online (search for “bottle pour spouts” or “speed pourers”). They usually come in packs of 6-12 for just a few dollars. The metal ones with the small red or black rubber caps are perfect—they’re what bartenders use, and they work beautifully for flavored syrups.

Flavored Syrups to Offer: Fill your spouted bottles with homemade or store-bought syrups:
- Vanilla syrup
- Caramel sauce
- Peppermint syrup
- Hazelnut syrup
- Salted caramel
- White chocolate sauce
Label each bottle so guests know what they’re pouring. This is where those vintage book pages come in (more on that below). I often use a label maker that gives a retro feel.

The pour spouts make it easy to drizzle exactly the right amount without mess, and the vintage bottles make even store-bought Torani syrup look expensive and artisanal.
Small Plates: Pretty and Practical
Small plates serve double duty at your hot cocoa station. Guests can use them as saucers under their mugs (catching drips and providing a place for their spoon), or they can hold treats like cookies, biscotti, brownies, or fudge to accompany their cocoa.
What to Thrift:
- Mismatched dessert plates or bread plates (6-8 inch diameter)
- Vintage china in holiday colors or patterns
- White ironstone plates (these go with everything)
- Floral china from different sets
- Colorful Fiestaware or vintage restaurant china
- Glass plates with pretty details
Styling Options: Stack 4-6 plates next to your mugs so guests can grab one. Or use individual plates as staging areas—place a pretty plate, top it with a vintage napkin, set a mug on the napkin, and tuck a spoon alongside. This pre-staged setup looks beautiful and makes service easy if you’re hosting a party. You can also use small plates as catch-alls for tea bags, cocoa packets, or wrapped candies.

Cloth Napkins: The Detail That Elevates Everything
Paper napkins are fine, but vintage cloth napkins take your hot cocoa station from functional to truly special. Thrift stores have tons of cloth napkins, often in holiday colors, and they’re usually very inexpensive.
What to Look For:
- Linen napkins in white, cream, or natural colors
- Cotton napkins in red, green, plaid, or holiday prints
- Embroidered napkins (look for vintage hand-embroidered ones with monograms or details)
- Cloth dinner napkins you can fold or roll
- Vintage tea towels that can double as large napkins
- Sets with minor stains (you’re using them for hot chocolate, not a formal dinner—who cares?)
How to Display Them: Roll napkins and tie with twine or ribbon, standing them up in a small crock or basket. Fold them into quarters and stack them in a neat pile. Tuck a rolled napkin into each mug before guests arrive. Or fold napkins and place them under small plates for an elegant touch. If you find holiday-themed napkins with embroidered snowflakes or “Joy” stitched on them, those become part of your decor as well as serving a function.

Creative Labels Using Vintage Book and Music Pages
Here’s where your hot cocoa station gets really personal and charming: handmade labels using vintage book pages or sheet music. This costs almost nothing and looks intentionally curated.
Where to Source Paper:
- Old books from thrift stores (look for damaged books in the free pile or 25-cent bin—you’re not destroying valuable books)
- Vintage sheet music (abundant at thrift stores and often very inexpensive)
- Old dictionaries or encyclopedias
- Damaged hymnals or songbooks
- Vintage cookbooks with stained or torn pages
- Old maps or atlas pages for a unique look
How to Make Labels:
Option 1: Handwritten Labels
- Cut book or music pages into tag shapes (rectangles, ovals, or traditional tag shapes with one pointed end)
- Punch a hole at the top if you want to tie them on with twine or ribbon
- Write directly on the vintage paper with a fine-tip permanent marker, calligraphy pen, or paint marker
- Label your jars: “Marshmallows,” “Peppermint,” “Chocolate Chips,” “Toffee Bits”, etc
- Attach to jars with twine, ribbon, or mini clothespins
Option 2: Printed Labels
- Scan your vintage pages and print them on regular printer paper or cardstock
- Type your labels in a pretty font, print, and cut out
- Glue printed labels onto the vintage-looking paper background
- Attach to jars with double-sided tape or glue
Option 3: Mix of Both Print the food names in a nice font, then glue those printed labels onto torn pieces of vintage book pages for a layered, dimensional look.
Where to Use These Labels:
- Tied around the necks of your syrup bottles
- Attached to glass jars with jute twine
- Taped to small signs indicating “Hot Cocoa Station” or “Warm Your Soul”
- On small folded tent cards identifying each syrup flavor
- As tags on your basket of treats
The vintage paper adds warmth and character while clearly identifying what everything is. Music pages are especially beautiful—imagine “Peppermint Syrup” written on a piece of “Silent Night” sheet music. It’s those thoughtful details that make your hot cocoa station feel special rather than thrown together.

How to Arrange Your Thrifted Hot Cocoa Station
Now that you know what to look for, let’s talk about arranging everything for both beauty and function.
Step 1: Choose Your Location Pick a spot where guests can easily access your station. A kitchen counter, sideboard, or bar cart all work beautifully. Make sure you’re near an outlet if you’re using a slow cooker or electric kettle for hot water.
Step 2: Start with Your Tray Place your largest tray down first—this defines your space and corrals everything. If you’re using a bar cart, you don’t need a tray; the cart itself is your foundation.
Step 3: Create Levels Hot cocoa stations look best with varying heights. Use your smallest trays, wooden cutting boards, or even stacked books wrapped in fabric to create risers. Place taller items (like apothecary jars) on the main level, and shorter items on risers.
Step 4: Place Your Hot Cocoa Source Whether it’s a slow cooker with hot chocolate, a kettle with hot water and cocoa mix packets, or a thermal carafe, this is your anchor. Position it where it’s easy to pour but not in the way of toppings.
Step 5: Arrange Mugs If you have a mug tree, position it prominently. Otherwise, stack or arrange mugs so guests can grab one easily. Place small plates nearby or already staged with napkins.
Step 6: Line Up Your Toppings Arrange your glass jars in a row or cluster them in an appealing way. Put the most popular items (marshmallows, whipped cream) front and center.
Step 7: Display Your Syrups Arrange your vintage bottles with pour spouts together. Their varying heights and bottle shapes create visual interest. Make sure labels are visible.
Step 8: Add Your Small Crocks Position your crock of spoons, crock of candy sticks, and any other small containers where they’re accessible but not cluttered.
Step 9: Fold or Roll Napkins Display your cloth napkins attractively. If you rolled them, stand them in a small basket or crock. If you folded them, stack neatly or tuck them into a spot that makes sense.
Step 10: Add Decorative Touches This is where you make it feel like Christmas. Tuck in some evergreen sprigs around the base of jars. Add a small vintage ornament or two. Place a few cinnamon sticks on the tray for both decoration and stirring. If you have battery-operated fairy lights, weave them carefully through your display for a magical glow.
Step 11: Make a Sign Create a simple sign using your vintage paper method: “Hot Cocoa Bar,” “Warm Your Spirits,” “Build Your Own Cocoa,” or something festive. Place it in a small thrifted frame or prop it against your taller items.

Seasonal Adaptations for Your Thrifted Station
The beautiful thing about building your drink station with thrifted items is that it’s not locked into one holiday. Here’s how to adapt it:
Christmas: Add evergreens, red and green accents, peppermint sticks, and candy canes. Use your holiday-themed napkins.
Winter (Post-Christmas): Remove the Christmas-specific elements. Keep it elegant with white, silver, and blue accents. Add snowflake decorations or winter berry stems.
Valentine’s Day: Swap in red napkins, add chocolate-covered strawberries on those small plates, and use your prettiest floral vintage mugs.
Fall: Transform it into an apple cider or coffee bar using the same vessels. Add small pumpkins, cinnamon sticks, and autumn-colored napkins.
Budget Breakdown: What This Actually Costs
Let’s talk real numbers. Here’s what you might spend building a complete thrifted hot cocoa station:
- Large serving tray: $3-8
- 8-10 mismatched vintage mugs: $1-3 each = $8-30
- Vintage mug tree (if you find one): $3-6
- 4-6 glass jars various sizes: $1-3 each = $4-18
- 3-4 small crocks for utensils and candy: $1-2 each = $3-8
- 8-10 mismatched silverplate spoons: $0.25-1 each = $2-10
- 3-4 glass bottles for syrups: $1-3 each = $3-12
- Pour spouts (bought new online): $5-20 for a set
- 6-8 small plates: $0.50-2 each = $3-16
- Cloth napkins (if not found, 6-8): $0.50-2 each = $3-16
- Old book for labels: $0.25-1
- Decorative elements (optional): $5-10
Total Cost: $35-145 depending on how elaborate you go and your thrift store prices.
Compare that to buying a new “hot cocoa bar set” from a home goods store which easily runs $100-200 and doesn’t have nearly the character or quality of vintage pieces.
The Joy of a Thrifted Hot Cocoa Station
There’s something deeply satisfying about offering your guests hot chocolate from a station you curated entirely from secondhand finds.
Every mug has a story, every jar once held something in someone else’s kitchen, and those silverplate spoons have stirred thousands of cups of coffee and tea over decades. When you thrift your cocoa station, you’re not just decorating—you’re giving beautiful old things a new purpose and creating a gathering place that feels warm, welcoming, and uniquely yours.

Plus, when the holiday season ends, you’re not stuck with single-use Christmas decor. Those mugs become your everyday coffee cups. The jars store your pantry staples. The trays serve appetizers. The napkins get used year-round. It’s decorating that works as hard as you do.
So grab your reusable shopping bags and hit your local thrift stores. Your perfect hot cocoa station is out there waiting, one mismatched mug at a time.
Read more about budget holiday ideas:
The Ultimate Guide to Thrifting Christmas and Holiday Decor
Unique Christmas Decor: How to Use Branches in Vases for a Festive Touch