Ikea DIY Kitchen Island with Thrifted Counter Top!
This post may contain affiliate links. Read our disclosure…
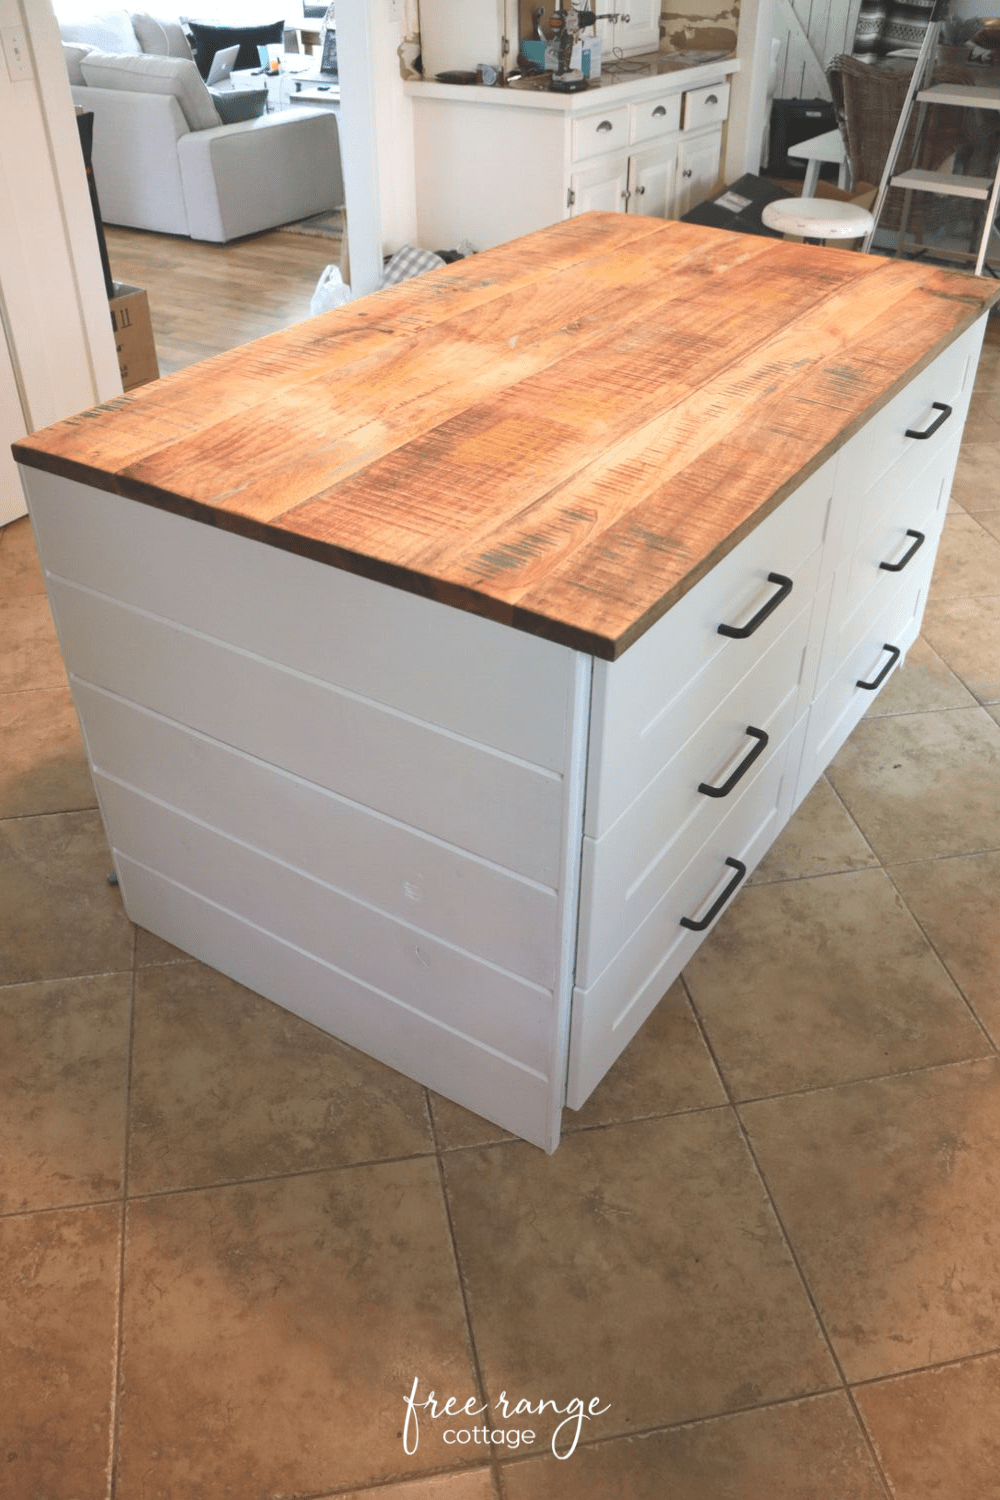
It’s finally finished! Our IKEA free-standing kitchen island with genuine wood top, is a perfect fit. This was a pretty simple Ikea hack with quick installation. Hallelujah!
It turned out to be the perfect kitchen island for our small kitchen. The shiplap sides and back are making me so happy!
Read on for how we put it together and a complete tour. We’re so happy with the end result.
New Kitchen Island and Extra Storage
We began this “island journey” when we first bought our house sixteen years ago! There was an undersized island with a butcher block countertop. It was good quality.
However, after water had flooded into our entire first floor, I came up with an idea.
Move the center island to a different wall in the kitchen. Then take the built in cabinets in our bedroom sitting area to make a new and bigger island.
We had that one for at least a decade. It wasn’t ideal because the cabinets were old and didn’t really deliver a lot of storage space.
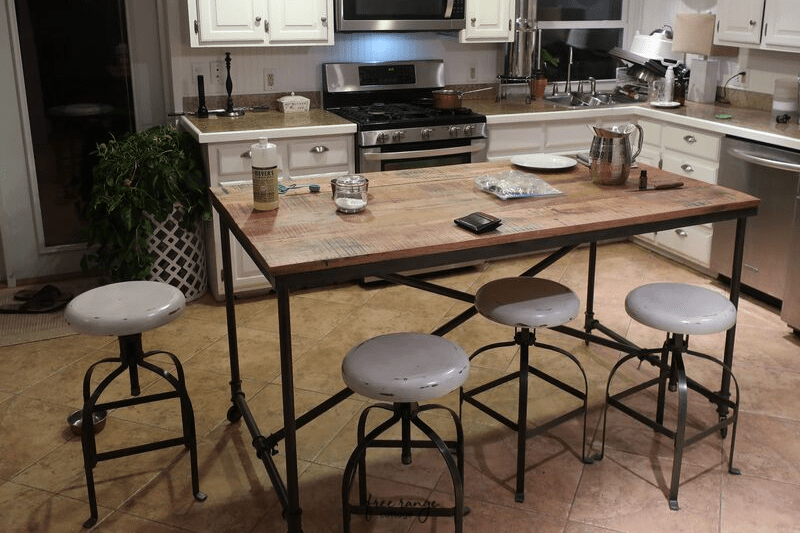
Fast forward to last year when I found this cool, industrial work bench kind of thing at our local thrift store! It was actually a brand new piece that had been donated by a furniture store in the area. I scored it for around $60!
The above picture was the only “before picture” I could find!
It was just the perfect size, much less expensive than a custom kitchen island, and it was made of durable material!
Well the storage thing is a BIG issue in an old kitchen like ours. Especially because we cook a lot.
My wheels started turning. How to get some storage in that island? So of course I was looking at magazines for ideas! More on that in a minute.
IKEA Kitchen Cabinets that we used
The island is made of two thirty inch IKEA Sektion base cabinets on the bottom.
They each have four drawers. Three large ones and the hidden small one in the top drawer.
They’re called Maximera and the drawer fronts are Grimslov in off-white.
These drawers hold SO MUCH STUFF! They’re like the Clown Cars of the kitchen!
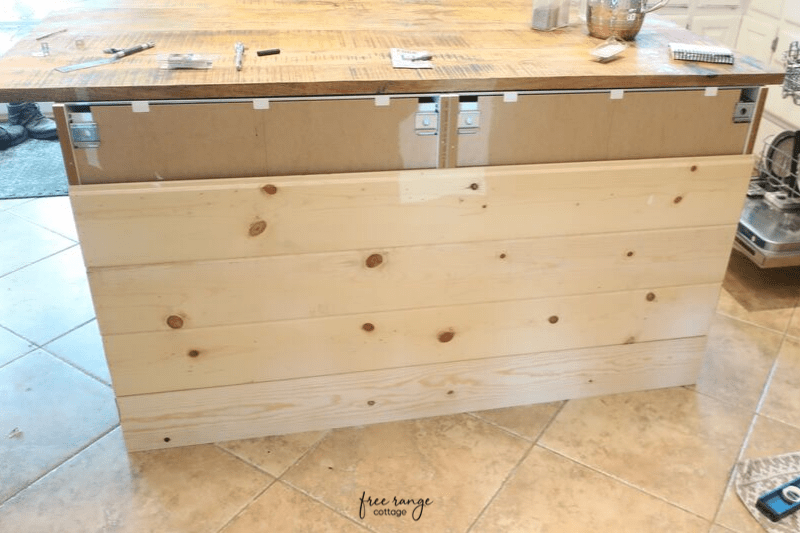
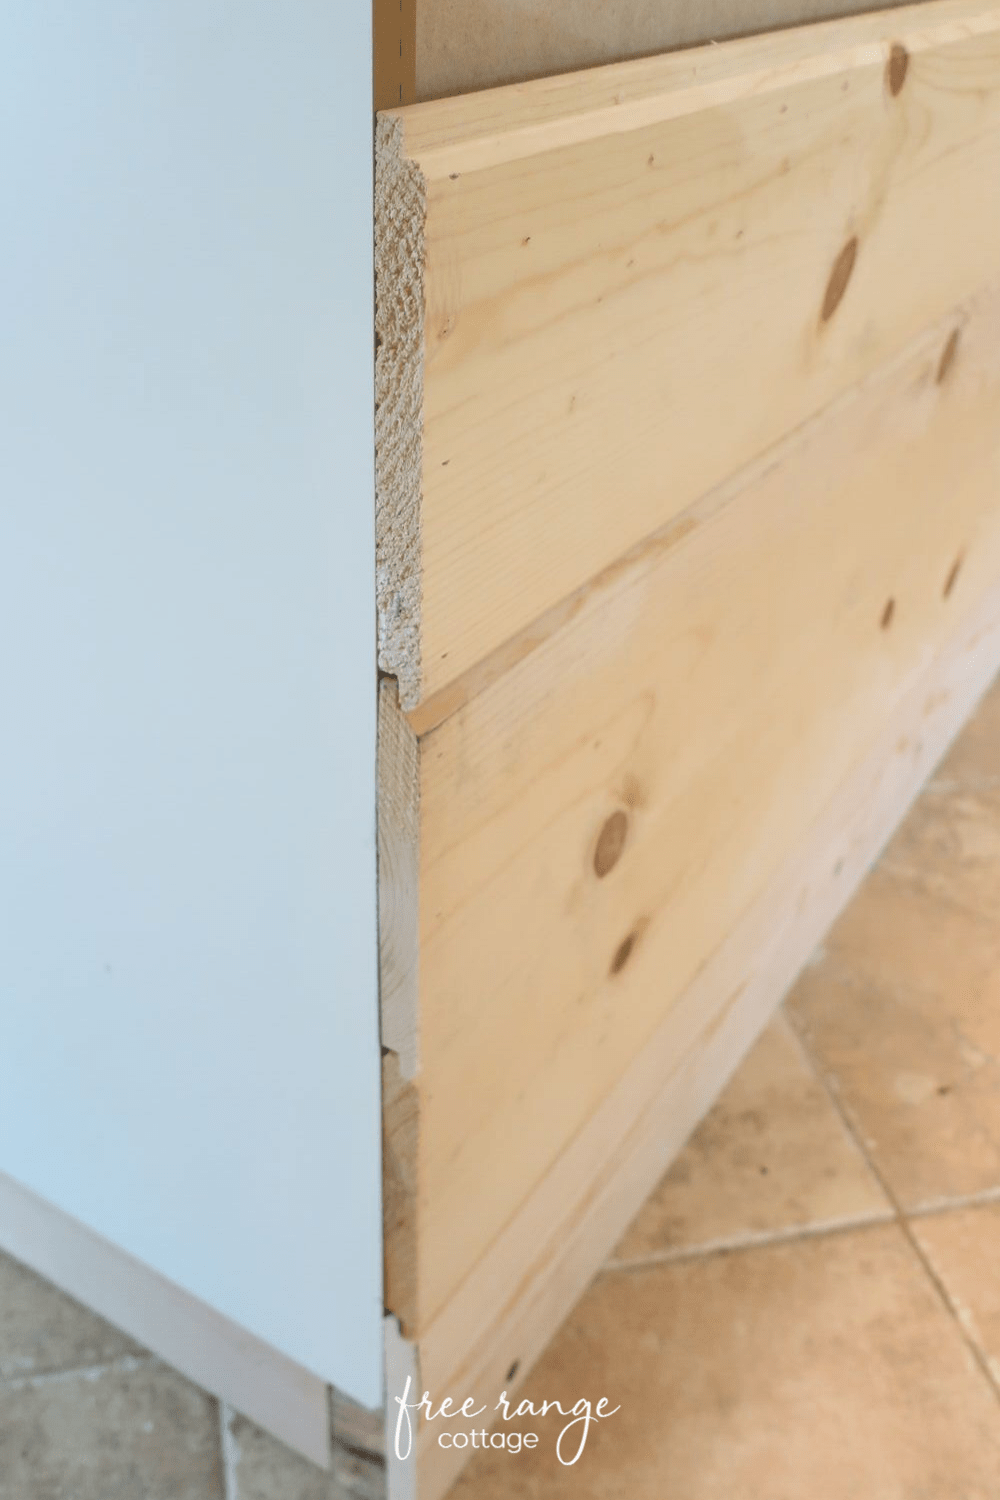
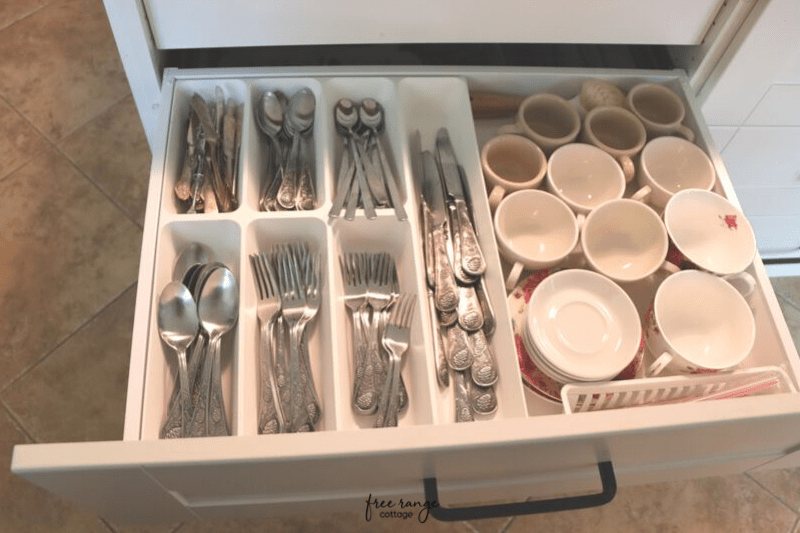
After using our tiny little, circa 1980 drawers for so long, I was just astonished at how much could fit in these drawers. Don’t even get me started on the organizers that go inside!
There is a place for all of the silverware, utensils, storage jars, knives, cutting boards, baking items, small appliances, and even some small espresso cups!
The drawers also have a soft close feature. When you close them they don’t slam shut. It’s pure luxury I tell ya’. Scroll down to see the inside of them!
So enough gushing about these cabinets because there is ONE con that I can find.
They come flat packed and have to be put together. Not the worst thing in the world.
We’ve put together several IKEA furniture pieces, so we’re familiar with their instructions. It’s kind of funny but the instructions have no words, only pictures! I guess pictures are the universal language.
We still ( 2 years later) think the kitchen cabinets were a great purchase, great deal, and great addition to our kitchen!!
Shiplap sides and back
As I said above, I was looking through magazines at different farmhouse style kitchen islands. I found this shiplapped beauty in The Cottage Journal, Country Cottage Autumn 2019 issue.
Of course I took it to Rob, my resident handyman (and hubby) to figure out if we could put it together.
After some discussion and a trip to Lowe’s, we had a plan.
We used the shiplap boards from Lowe’s on the back.
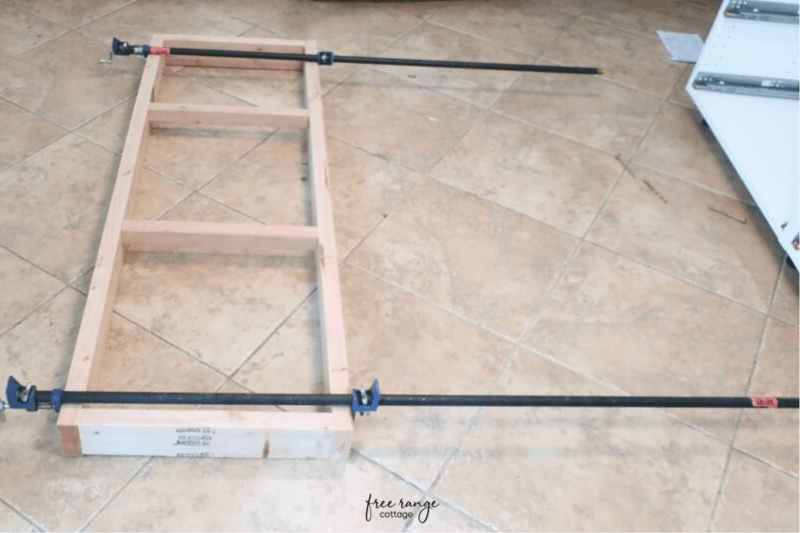
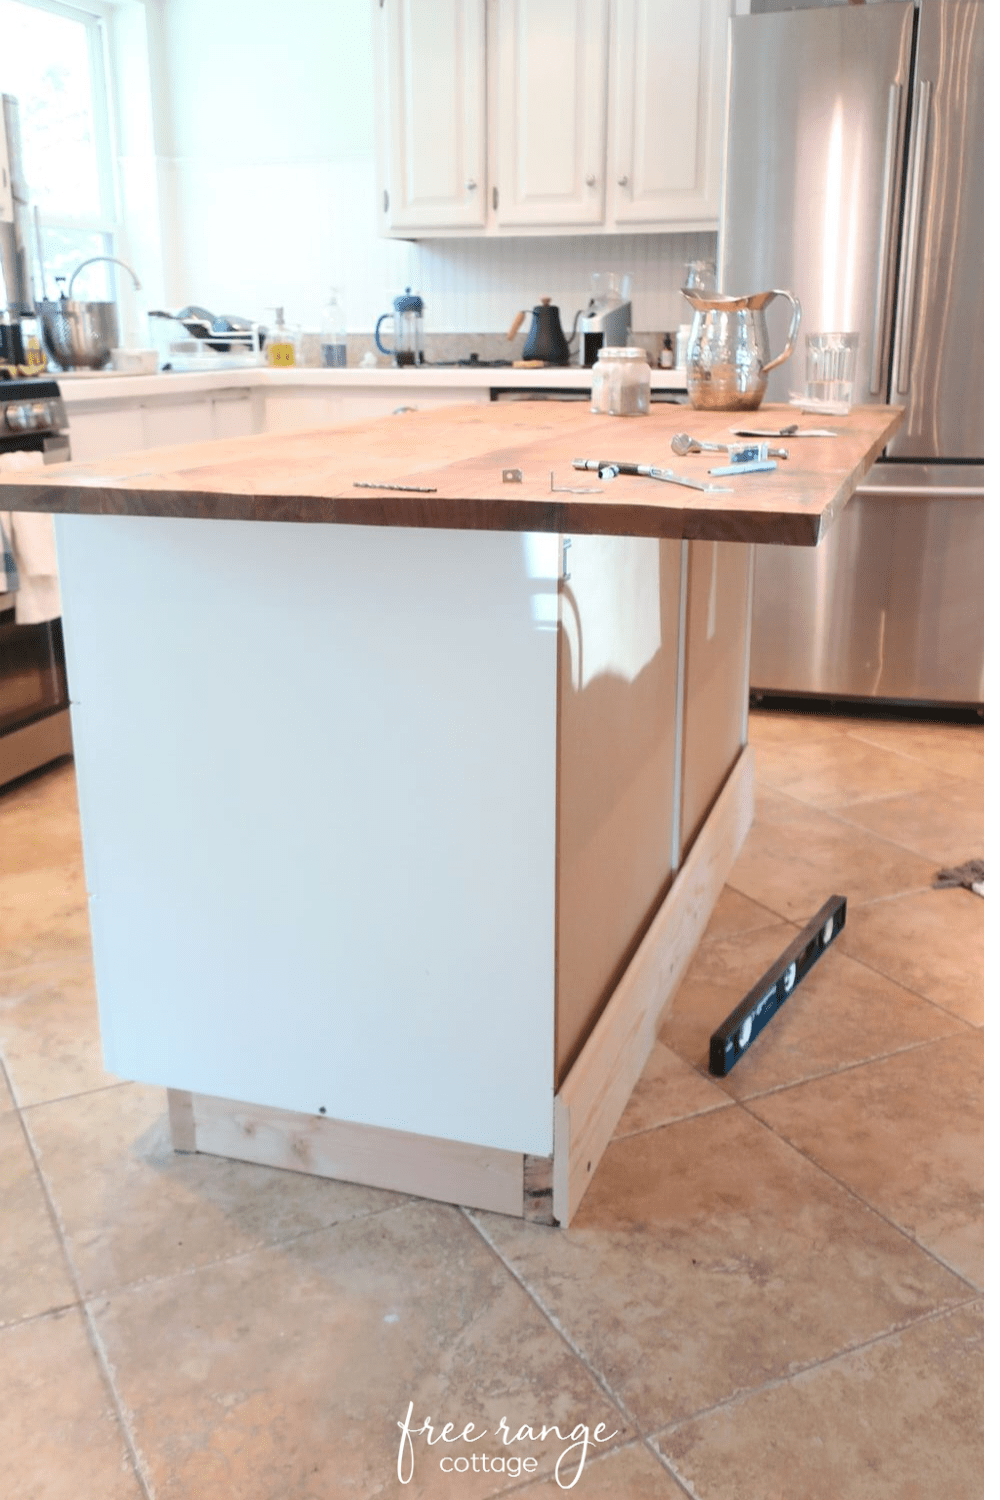
Rob cut the boards long enough to support the top overhang where the stools are. The overhang measures twelve inches.
He added a small piece of trim to the front (drawer side) and the back (seating side) to give it a finished look.
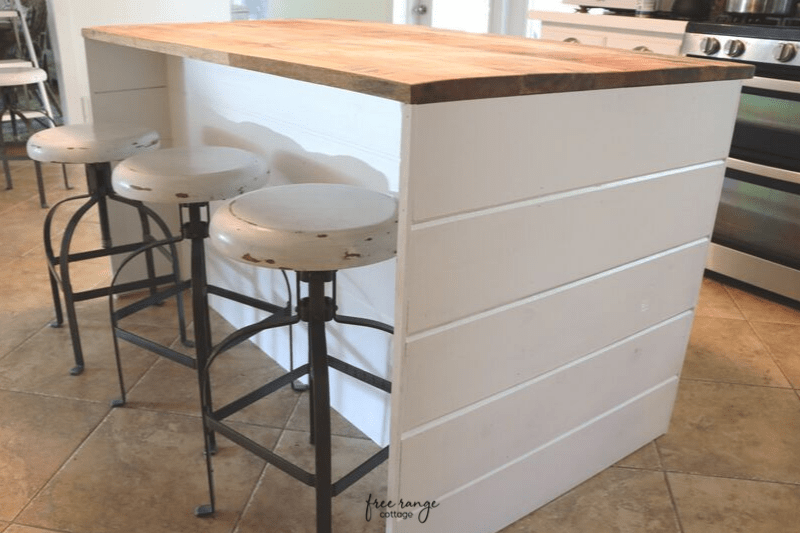
We added two coats of paint. Benjamin Moore Advance paint in white Semi-gloss.
Stools are from World Market and I chalk painted the top white.
Thrifted and Upcycled Countertop
We loved the wood top on the industrial worktable that I had thrifted. It’s hardwood and it says “made in India” on the bottom.
I haven’t researched what kind of wood it is but this stuff is tough! I suggested that we just upcycle it on the new base cabinets.
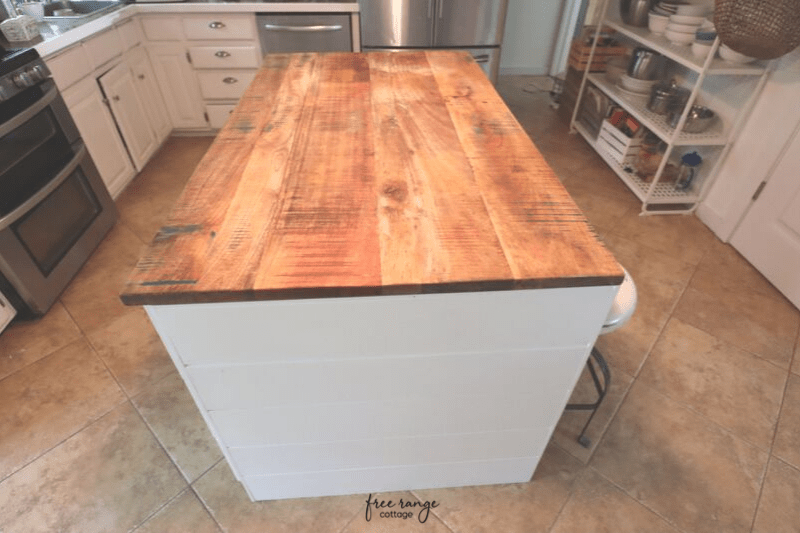
We did think about replacing the top with a solid surface such as stone or quartz.
However, we’re trying to improve the kitchen on as small of a budget as we can.
I’m so glad we decided to repurpose this top. I really like how it looks and functions on the island.
Rob had to trim it down a little bit since we went from roughly a six foot top to around five feet.
We could have left an overhang on each side. But I had my mind set on a waterfall kind of look. Which just means that your edge meets up with your side with no overhang!
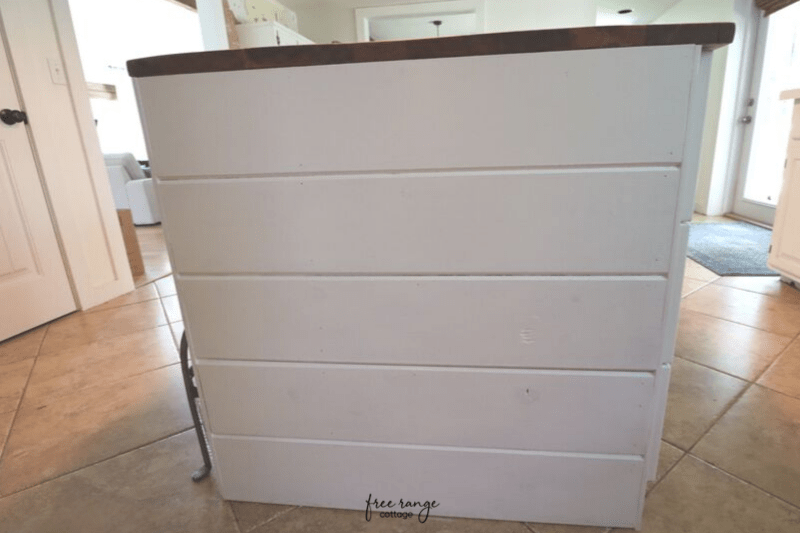
It’s more of a modern style and I love a modern farmhouse look, with some boho, and industrial thrown in. Ok, it’s eclectic!
We lightly sanded the top and treated it with food grade oil. It deepened the color a little and it looks like new!
Overall this thrifted and upcycled top is a win in my book!
Kitchen Island Hardware
I found these black iron drawer pulls at IKEA as well. They’re the Borghamn handles. They fit right in with the modern farmhouse look we’re going for in the kitchen.
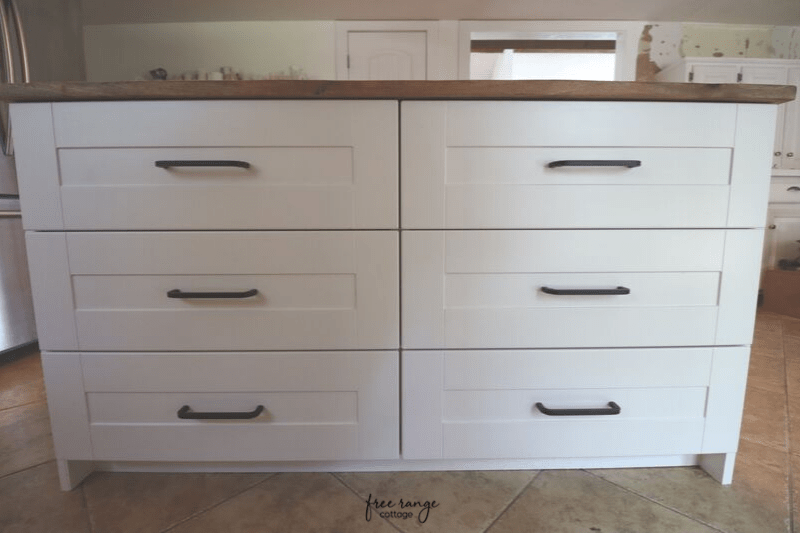
I have to admit that I had purchased the longer one originally. I exchanged them for the size down and I’m so glad I did. However, I might use the longer ones somewhere else in the kitchen. They’re so dramatic and you can’t beat the price!
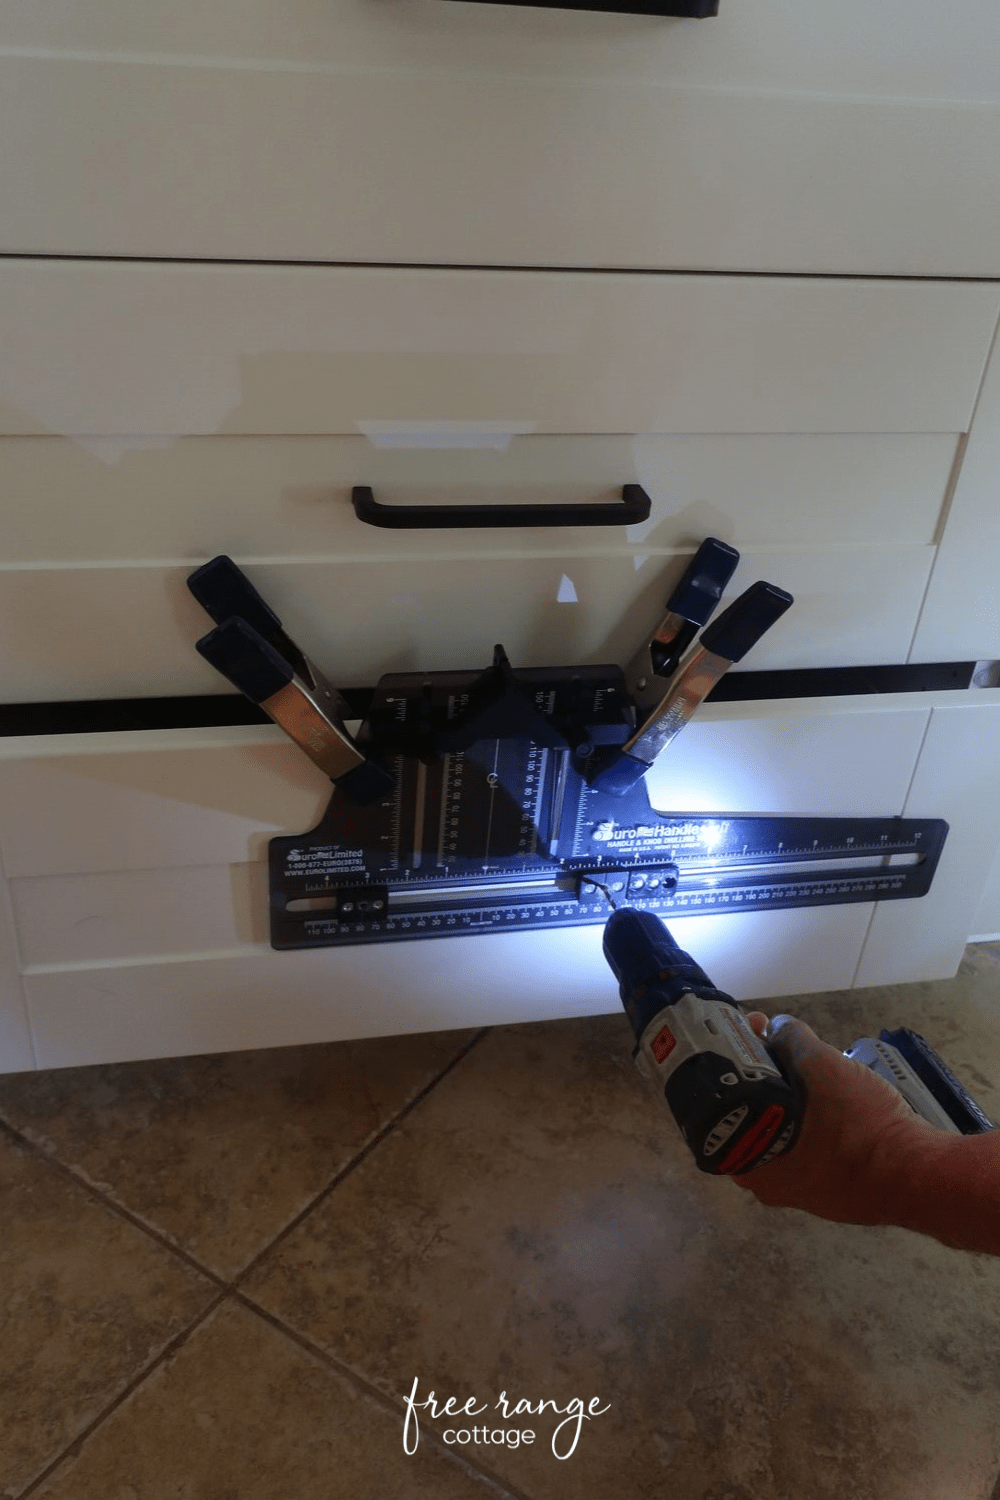
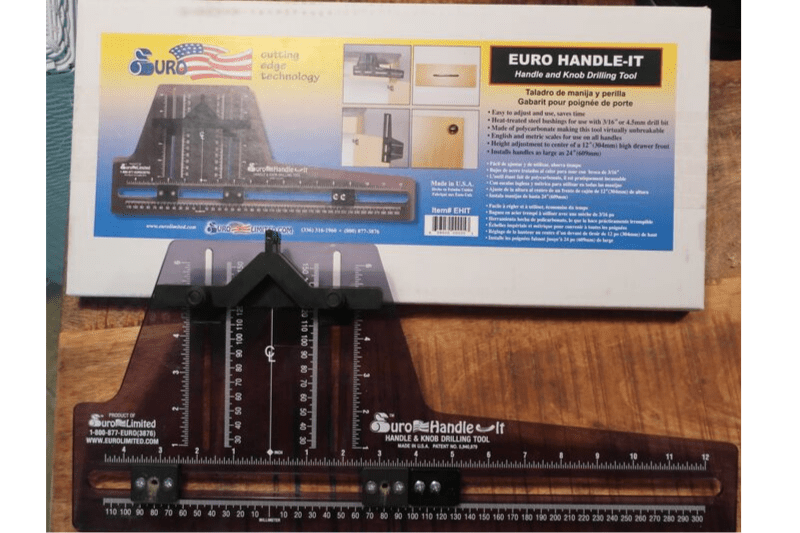
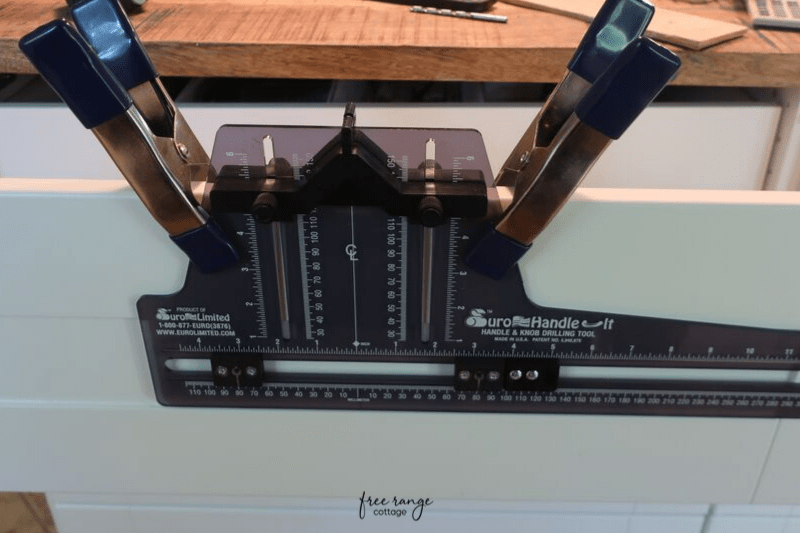
Rob found this handy tool to be able to put the hardware on easily and accurately.
Note from Rob: The pulls are longer than five inches wide so the Kreg jig hardware tool wouldn’t work. These handles are over sized at six and a quarter inches.
This tool was a no brainer to use and made the handles look like a pro installed them. It can also be used for hinges. Awesome!
Drawers and Organizers
I’ll just go ahead and say that whoever designed these drawers deserves a prize!
They pull out full length and hold so much stuff that it’s just incredible. If you dream of an organized kitchen, IKEA helps to make it happen, for real!
If you purchase cabinets and drawers, be sure to choose the ones that pull out all the way.
We had the other ones (why?) that don’t extend and open like these do, in our shopping pick list. Luckily, an employee from kitchen planning helped us to get the right ones.
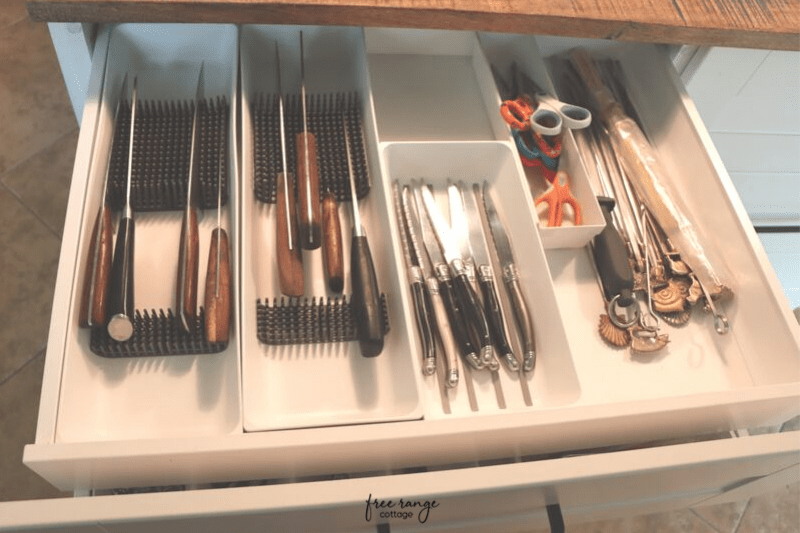
Most of the drawer inserts we’re using were also bought at IKEA. I especially love the knife holder that goes in one of our hidden drawers.
Also, the cooking utensils used to really get on my nerves. In the small drawers of our old cabinets, they were just a hot mess and didn’t all fit in one drawer.
Now, there are still a lot of them, but at least they look somewhat organized!
Conclusion
To DIY a shiplap kitchen island with an upcycled countertop was worth the effort! So much of our kitchen necessities can live in the huge drawers that fully extend for maximum storage.
Be sure to get help from a kitchen designer or staff when you visit the showroom. You’ll pick out your individual pieces (base, drawers, drawer fronts, countertop, drawer pulls, etc) and create a purchasing pick list.
Then you’ll head downstairs to pick them up.
Putting the cabinets together takes a little time but is pretty straight forward once you get going.
If you have a small space, you can choose from different sizes of Ikea products, including kitchen cabinets and kitchen worktops.
Keep in mind that some of them are natural material, and also thick veneer. Just make sure you’re getting what you want!
FAQs
Is it cheaper to buy or build a kitchen island?
Average costs of a custom kitchen island are between $3,000 and $4,000.
Buying a kitchen island from a furniture store or online usually starts at around $1500. Also, there are limited sizes to choose from.
Our DIY IKEA kitchen cabinet island cost us around $800. including the countertop. Your price could vary depending on the cabinets and countertop that you choose.
We found that it was a great cost savings!
Does IKEA have a kitchen island?
Yes! They have several to choose from. You can see them setup in kitchens when you visit the showroom or online.
Check with your closest store (on the website) about your choice being in stock or able to ship.
Can you DIY a kitchen island?
Of course you can! I would definitely get a friend to help hold and assemble things (that’s a real friend).
If you’re new to DIY projects, just plan it out and take your time. You’ll learn some new skills along the way.
You can always reach out to us if you get stuck. We’ll help however we can!
Can you use kitchen cabinets to make an island?
That’s exactly what we did. We used two IKEA kitchen cabinets. They come in various sizes and finishes. You can customize the size as well as add in a sink unit, or whatever you need!
Previously we made a kitchen island out of some (bedroom) built in cabinets. We added a concrete top.
Kitchen cabinets make great kitchen islands!
Can I build my own island?
If you have some basic woodworking skills, there a many free kitchen island plans online.
Ana White and Shanty2chic are two that come to mind.
What can I use for a kitchen island?
There are a variety of things that can be made into a kitchen island. It depends on if you’re looking for additional storage, or just a worktop.
Base kitchen cabinets are great for additional storage.
A table, a dresser, a workbench, file cabinets with a wood top! There are many creative examples online.
I hope you enjoyed this little island tour!
We’re DIYing the rest of our dated kitchen, on a budget.
Be sure to subscribe so you don’t miss the updates!
Thanks so much for visiting Free Range Cottage today.



Wondering if this hack would be possible without the base you added and screwed to the floor. I’m making an island for my apartment rental, so I can’t attach anything to the floor. Thanks!
We made the island with the shiplap coming all the way to the floor. The small overhang gives it added support (kind of like legs).
I hope that makes sense!
Good luck on your DIY!
Great ikea hack can i ask what is the overall length by breath of the finished counter top just what to gauge if it will fit in our kitchen remodel – many thanks, Tony
Hi Tony. The kitchen island can be customized to any size you need. Ours is about 3 feet by 5 feet.
question- did you actually use the old table top for your new island top?
Yes we sure did! It has been great. No regrets!
Hi! I love this project! It looks beautiful. Did you feel like the Advance white color matched the Ikea off white well? Or did you color match them by taking a door in? From the pictures it looks perfectly matched.
Hi Kelly. We got lucky! The advance white color matches really well with the IKEA white!
What are the demensions of counter top and cabinets
Hi Roger,
I just posted a brand new video all about our DIY kitchen island. In the description you’ll find measurements and links to everything we used. I’ve linked it for you below. Hope that helps!
https://m.youtube.com/watch?v=LPuQwrjhdX0
About how much did you spend on the cabinets? I love this idea but I’m looking at moving into my first home sometime within the next couple months and I need to be smart about my budget
IKEA has a variety of base cabinets to choose from. The drawer or door fronts will vary in price. https://www.ikea.com/us/en/cat/kitchen-cabinets-fronts-24254/
Previously we have used second hand cabinets for the island base, which is also a definite budget stretcher! Congratulations on shopping for your home and thanks so much for visiting FRC!
I love your kitchen island hack!!! So much inspiration. Quick question does it just sit on top of your floor or is it secured to the floor?
Yes, we anchored it to the floor. Thanks so much for visiting today!